Staying hydrated is crucial for cyclists of all levels, and the right hydration bladder can make all the difference on your rides. Whether you’re tackling technical mountain bike trails or enjoying long road rides, having easy access to water is essential for performance and enjoyment. This guide will help you navigate the world of hydration bladders for cycling, covering everything from capacity and materials to maintenance and top recommendations.
Why Hydration Bladders Matter for Cyclists
Proper hydration is essential for optimal cycling performance. When you’re pedaling for hours, especially in warm weather, your body loses significant amounts of fluid through sweat. Dehydration can lead to decreased performance, cramping, and even dangerous heat-related conditions.
Hydration bladders offer several advantages over traditional water bottles for cyclists:
- Higher capacity (typically 1.5-3 liters) than standard bottles
- Hands-free drinking through a convenient tube and bite valve
- Better weight distribution when carried in a backpack
- Reduced need to stop and reach for bottles
- More storage space on your bike frame for other accessories
For big days in the saddle or backcountry adventures where refilling opportunities are limited, a quality hydration bladder is an invaluable piece of equipment.
Key Factors to Consider When Choosing Hydration Bladders for Cycling
Capacity
Bladder capacity is measured in liters and typically ranges from 1 to 3 liters. The right size depends on your riding style, duration, and conditions:
| Capacity | Best For | Ride Duration | Considerations |
| 1-1.5L | Short rides, races, lightweight setups | 1-2 hours | Minimal weight, less bulk |
| 2L | Medium-length trail rides | 2-4 hours | Good balance of capacity and weight |
| 3L | All-day adventures, hot weather, remote areas | 4+ hours | Maximum hydration, heavier when full |
Material and Durability
The material of your hydration bladder affects durability, taste, and maintenance requirements:
- Thermoplastic Polyurethane (TPU): Highly durable, flexible in cold temperatures, and resistant to bacteria.
- Ethylene Vinyl Acetate (EVA): Durable and water-resistant with a relatively firm texture; not biodegradable but offers good flexibility in cold temperatures
Look for BPA-free materials and antimicrobial treatments that help prevent mold and bacteria growth, especially important for cycling in warm conditions.
Hose Design and Length
The drinking tube is your access point to hydration while riding. Consider these factors:
- Length: Should be long enough to reach your mouth comfortably while riding without excess tubing that can catch on branches
- Diameter: Wider tubes deliver more water per sip but add weight
- Quick-disconnect feature: Makes cleaning and refilling easier
- Insulation: Helps keep water cool in hot weather and prevents freezing in cold conditions
Mouthpiece and Bite Valve
The bite valve is where you actually drink from and can significantly impact your hydration experience:
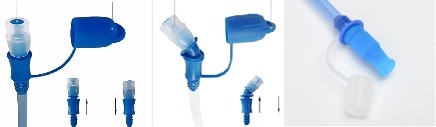
- Bite valve types: Self-sealing silicone (most common), push-pull, or twist-lock mechanisms
- Flow rate: Some valves deliver more water per sip than others
- Lock mechanism: Prevents leaking in your pack when not in use
- Dust cover: Keeps the mouthpiece clean when riding on dusty trails
Many cycling-specific packs include magnetic clips to keep the bite valve accessible on a shoulder strap for easy access while riding.
Opening and Filling Design
How you fill and clean your bladder matters for convenience and maintenance:
- Slide-top closure: Wide opening for easy filling and cleaning
- Screw cap: Secure but sometimes narrower and harder to clean
- Zip-top closure: Provides the widest opening for thorough cleaning
- Quick-connect ports: Allow for refilling without removing from pack
Pack Compatibility
Consider how the bladder will fit in your existing pack or if you need a dedicated hydration pack:
- Check if your current backpack has a dedicated hydration sleeve
- Verify the maximum bladder size your pack can accommodate
- Consider how the bladder hangs when full (some designs prevent “barreling”)
- Look for hanging systems that keep the bladder from collapsing as water is consumed
Step-by-Step Selection Guide
Step 1: Determine Your Riding Style and Needs
Different cycling disciplines have different hydration requirements:
Mountain Biking
- Prioritize durability for rough terrain
- Consider a bite valve lock to prevent leakage on technical descents
- Look for secure hose management to prevent snagging on branches
Road Cycling
- Focus on lightweight, streamlined designs
- Consider aerodynamics and pack comfort in riding position
- Easy access to bite valve for frequent sipping
Step 2: Calculate Your Hydration Needs
As a general guideline, cyclists should aim to drink 16-24 oz (0.5-0.7L) of water per hour of riding, adjusting for temperature, humidity, and intensity. For example:
- For a 2-hour ride in moderate conditions: 1-1.5L capacity
- For a 4-hour ride in hot conditions: 2-3L capacity
- For all-day adventures with limited refill options: 3L capacity plus a bottle
Step 3: Consider Your Pack Setup
Your hydration bladder needs to work with your carrying system:
- Backpack users: Check internal dimensions and hanging systems
- Hip pack users: Look for compact, low-profile bladders (usually 1-1.5L)
- Frame bag users: Consider shape constraints of your specific bag
Step 4: Evaluate Additional Features
Consider which extra features matter most for your riding:
- Insulation: Valuable for hot weather rides to keep water cool
- Quick-disconnect: Makes refilling and cleaning much easier
- Antimicrobial treatments: Reduces cleaning frequency and prevents taste issues
- Measurement markings: Helpful for tracking water consumption
Pro Tip: For long-distance rides in remote areas, consider a bladder with a quick-connect filter adapter, allowing you to safely refill from natural water sources.
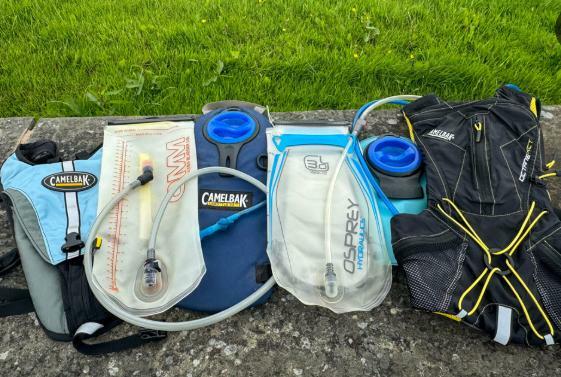
Top Hydration Bladders for Cyclists
Based on our analysis of performance, durability, and cyclist feedback, here are our top recommendations for hydration bladders:
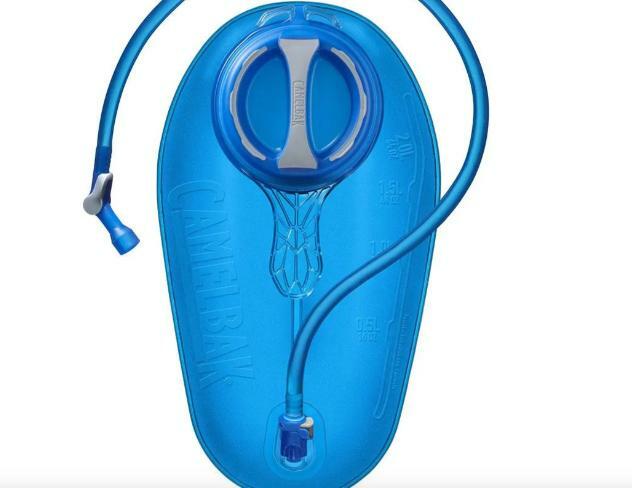
CamelBak Crux Reservoir
Capacity Options: 1.5L, 2L, 3L
The CamelBak Crux delivers 20% more water per sip compared to earlier models, with an ergonomic handle for easy refilling. The Big Bite valve features a leak-proof design, while the wide-mouth opening makes cleaning straightforward. Its antimicrobial treatment helps prevent mold and bacteria growth.
Pros
- High flow rate for quick hydration
- Durable construction
- Easy-to-fill design with handle
- Taste-free material
Cons
- Premium price point
- Slightly heavier than some competitors
- Can be difficult to dry completely
Best For: All-around cycling use, from mountain biking to road cycling. Ideal for riders who prioritize high water flow and durability.
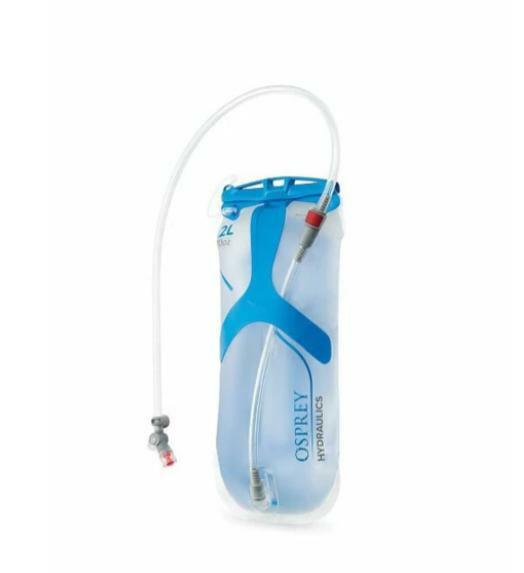
Osprey Hydraulics Reservoir
Capacity Options: 1.5L, 2L, 2.5L, 3L
The Osprey Hydraulics features a rigid backplate that maintains a flat profile in your pack and makes it easier to slide into a full backpack. The magnetic bite valve attachment keeps the hose secured to your pack strap, and the wide slide-seal top opening makes cleaning and filling simple.
Pros
- Rigid backplate prevents “barreling”
- Magnetic tube clip works well on the go
- Wide opening for easy cleaning
- Integrated handle for filling
Cons
- Slightly more expensive
- Rigid backplate adds some weight
- May not fit all pack hydration sleeves
Best For: Mountain bikers and trail riders who need a stable bladder that won’t slosh around in their pack. The magnetic clip is particularly useful on technical terrain.
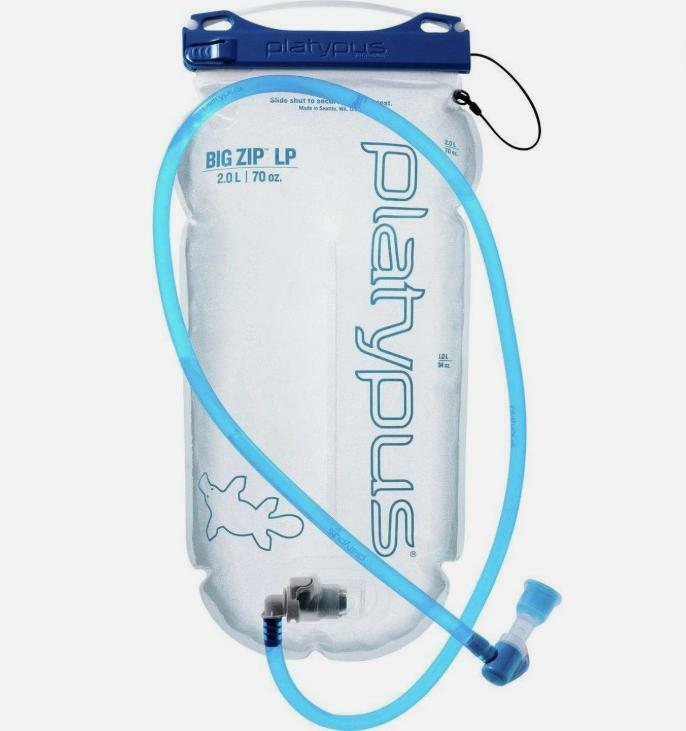
Platypus Big Zip EVO
Capacity Options: 1.5L, 2L, 3L
The Platypus Big Zip EVO features a wide zip-top opening that makes it exceptionally easy to clean and fill. The taste-free material ensures your water stays fresh, while the embedded silver-ion technology prevents microbial growth. The quick-disconnect hose system simplifies refilling and cleaning.
Pros
- Easiest to clean with zip-top opening
- Lightweight design
- Taste-free material
- Antimicrobial treatment
Cons
- Slightly lower flow rate
- Zip closure requires proper alignment
- Less rigid structure when full
Best For: Cyclists who prioritize easy cleaning and maintenance. Great for longer trips where keeping your hydration system clean is essential.
Comparison Table: Top Hydration Bladders for Cycling
| Model | Best For | Capacity Options | Weight (2L size) | Opening Type | Special Features | Price Range |
| CamelBak Crux | All-around use | 1.5L, 2L, 3L | 7.2 oz | Screw cap | High flow bite valve, ergonomic handle | $35-45 |
| Osprey Hydraulics | Mountain biking | 1.5L, 2L, 2.5L, 3L | 7.8 oz | Slide-seal | Rigid backplate, magnetic tube clip | $36-42 |
| Platypus Big Zip EVO | Easy maintenance | 1.5L, 2L, 3L | 6.0 oz | Zip-top | Silver-ion antimicrobial, quick-disconnect hose | $34-40 |
| HydraPak Shape-Shift | Versatility | 2L, 3L | 5.8 oz | Slide-seal | Baffle system, reversible for cleaning | $32-38 |
| Source Widepac | Hot weather | 1.5L, 2L, 3L | 6.5 oz | Slide-seal | Grunge-Guard technology, taste-free | $30-36 |
Find Your Perfect Hydration Solution
Ready to upgrade your hydration system for better rides? Explore our top recommendations for hydration bladders that match your cycling style.
Maintenance and Care for Hydration Bladders

Proper maintenance of your hydration bladder is essential for longevity and hygiene. Here’s how to keep your hydration system clean and functioning properly:
Daily Cleaning
- Empty the bladder completely after each ride
- Rinse with warm water (not hot, as it can damage some materials)
- Hang to dry with the opening down and the tube disconnected if possible
- Store in the freezer between uses to prevent microbial growth (optional)
Deep Cleaning (Weekly or Bi-Weekly)
- Mix a solution of warm water with mild dish soap or specialized cleaning tablets
- Fill the bladder with the solution and let it sit for 15-30 minutes
- Use a specialized cleaning brush to scrub the interior, especially corners
- Clean the tube by filling it with cleaning solution and running it through
- Pay special attention to the bite valve, which can harbor bacteria
- Rinse thoroughly with clean water until all soap residue is gone
- Air dry completely before storage
Pro Tip: For stubborn tastes or odors, use a mixture of 2 tablespoons of baking soda in 1 liter of water. Let it sit overnight, then rinse thoroughly.
Preventing Mold and Bacteria
Mold and bacteria are the biggest enemies of hydration bladders. Here’s how to prevent them:
- Never leave water in your bladder for extended periods
- Avoid using sugary drinks in your bladder if possible
- Use cleaning tablets specifically designed for hydration reservoirs
- Consider bladders with antimicrobial treatments
- Use a drying rack or improvised hanger to keep the bladder open while drying
Storage Tips
Proper storage extends the life of your hydration bladder:
- Ensure the bladder is completely dry before long-term storage
- Store with the opening open to allow airflow
- Keep in a cool, dry place away from direct sunlight
- Avoid folding or creasing the bladder, which can create weak points
- For long-term storage, place a paper towel inside to absorb any moisture
Dealing with Leaks
If your hydration bladder develops a leak:
- Check the connection points between the bladder and hose
- Inspect the bite valve for cracks or wear
- Look for punctures in the bladder material
- For small punctures, some manufacturers offer repair kits
- For significant damage, replacement is usually the best option
Hydration Bladders vs. Water Bottles for Cycling

Both hydration bladders and water bottles have their place in cycling. Understanding the pros and cons of each can help you choose the right option for different rides:
Hydration Bladders
Pros
- Higher capacity (1.5-3L vs. 0.5-0.75L for bottles)
- Hands-free drinking while riding
- Better weight distribution in a pack
- Frees up frame space for other accessories
- Less frequent refilling needed
Cons
- More difficult to clean and maintain
- Harder to monitor remaining water level
- Requires a compatible pack
- More expensive initially
- Can be warm against your back
Water Bottles
Pros
- Easy to clean and refill
- Simple to monitor water level
- Inexpensive and readily available
- Easy to swap between water and sports drinks
- No pack required
Cons
- Limited capacity (typically 500-750ml each)
- Requires removing hand from handlebar to drink
- Takes up frame space
- Can eject from cages on rough terrain
- Needs more frequent refilling
Best Scenarios for Each Option
| Scenario | Recommended Option | Reasoning |
| Short rides (under 1 hour) | Water bottles | Simpler, no need for extra capacity or pack |
| Technical mountain biking | Hydration bladder | Hands-free drinking, bottles can eject on rough terrain |
| All-day adventures | Hydration bladder + bottle | Maximum capacity, bottle for sports drinks |
| Hot weather rides | Insulated bottles or insulated bladder | Keeps water cooler longer |
| Racing | Depends on discipline and duration | XC races: bottles; Enduro/longer events: bladder |
“The best hydration system is the one that encourages you to drink regularly. Dehydration can reduce performance by up to 30%, so finding a system that works for your riding style is crucial.”
Many experienced cyclists use a combination approach: a hydration bladder in a pack for water and a frame-mounted bottle for electrolyte drinks or quick access.
Frequently Asked Questions About Hydration Bladders for Cycling

How often should I replace my hydration bladder?
With proper care, a quality hydration bladder can last 2-5 years. Signs it’s time to replace include persistent odors or tastes that won’t clean out, visible mold that can’t be removed, cracks or leaks in the material, or a bite valve that no longer functions properly. Premium bladders from brands like CamelBak, Osprey, and Platypus tend to last longer than budget options.
Can I put sports drinks in my hydration bladder?
While you can use sports drinks in hydration bladders, it’s not generally recommended as the sugars can promote bacterial growth and create cleaning challenges. If you do use sports drinks, clean the bladder thoroughly immediately after your ride. Many cyclists prefer to use water in their bladder and carry sports drinks in a separate bottle.
How do I prevent my water from getting warm during summer rides?
Several strategies can help keep your water cooler:
- Start with ice in your bladder (if the bladder material can handle it)
- Use an insulated bladder or tube sleeve
- Position the bladder against your back with minimal exposure to sun
- Consider freezing the bladder half-full overnight, then top up before riding
Why does my hydration bladder water taste like plastic?
A plastic taste usually indicates either a new bladder that hasn’t been properly rinsed before use or a lower-quality material. To eliminate plastic taste:
- Wash with warm, soapy water before first use
- Soak overnight with water and a tablespoon of baking soda
- Consider upgrading to a taste-free bladder made with higher-quality materials
- Avoid leaving water in the bladder for extended periods
How do I know when my hydration bladder is nearly empty while riding?
This can be challenging with bladders since you can’t see the water level. Some strategies include:
- Learn to feel the weight difference in your pack
- Some bladders have measurement markings visible from the outside
- Listen for the sound change when sucking air instead of water
- Track your drinking habits and time (e.g., if you typically drink 500ml per hour)
- Some newer bladders have transparent sections to check water levels
Conclusion: Choosing the Right Hydration Bladder for Your Cycling Adventures

Selecting the right hydration bladder for cycling can significantly enhance your riding experience. By considering your specific needs—ride duration, terrain, climate, and personal preferences—you can find a system that keeps you properly hydrated without getting in the way of your ride.
For most cyclists, investing in a quality bladder from a reputable manufacturer pays dividends in durability, taste-free water, and reliable performance. The CamelBak Crux, Osprey Hydraulics, and Platypus Big Zip EVO all offer excellent options for different riding styles and preferences.
Remember that proper maintenance is crucial for longevity and hygiene. Regular cleaning, complete drying, and proper storage will ensure your hydration bladder serves you well for many rides to come.
Whether you’re tackling technical mountain bike trails, enjoying long road rides, or exploring gravel paths, staying properly hydrated will improve your performance, safety, and enjoyment. The right hydration bladder makes that easy and convenient, allowing you to focus on what matters most—the ride itself.
Stay Hydrated on Your Next Adventure
Ready to upgrade your hydration system? Explore our top recommendations for hydration bladders that will keep you performing at your best on every ride.
