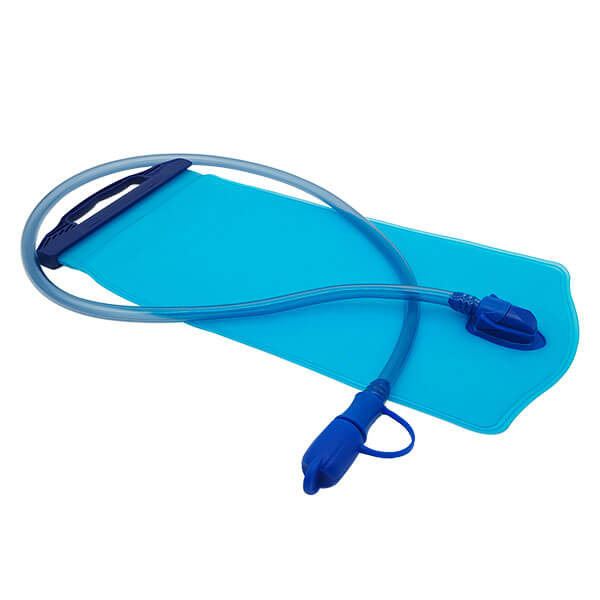
Hydration bladders have become indispensable gear for outdoor enthusiasts, providing a convenient and effective solution for staying hydrated during hikes, bike rides, or any other prolonged outdoor activity. If you’re a wholesaler or an importer dealing with hydration bladders, familiarizing yourself with the manufacturing process behind these sought-after items isn’t just beneficial, it’s integral to your business. This article aims to guide you through the complex process that transforms raw materials into practical, durable hydration bladders. By understanding this process, you’ll gain a deeper appreciation for your products, empower your decision-making, and enhance your ability to serve your customers. So, let’s dive in, and explore the production journey of hydration bladders.
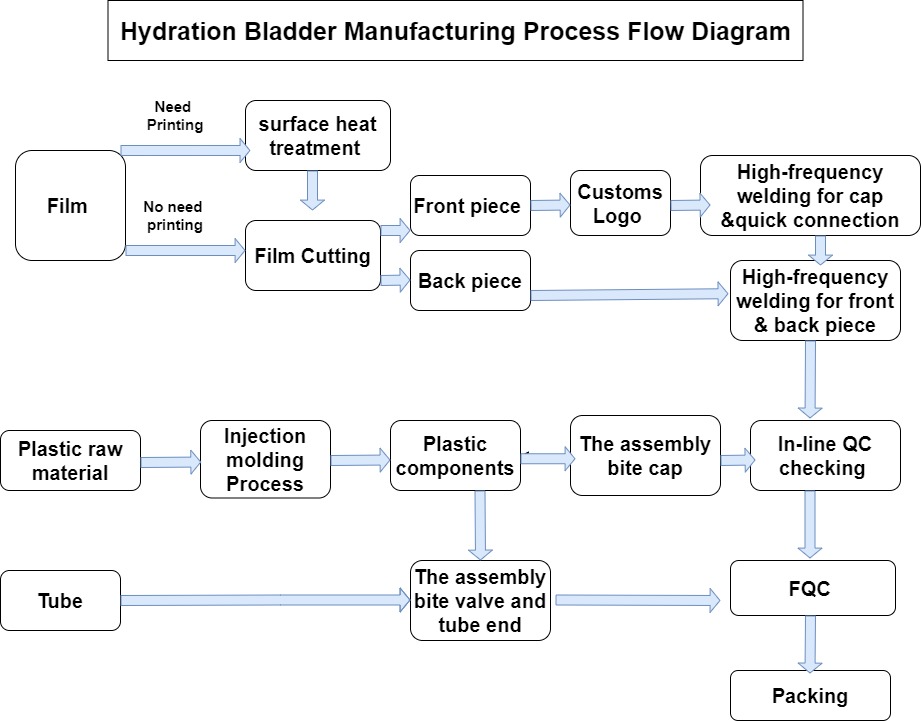
The manufacturing process of a hydration bladder involves The Injection molding Process, High-Frequency Welding Process, Assembly process, Quality control process, and Packing process. See the Process Flow Diagram below:
What are the primary materials?
The primary raw materials for manufacturing water bags are films and plastic components; the prominent films are Thermoplastic Polyurethane (TPU), polyethylene vinyl acetate (PEVA), and Ethylene-vinyl acetate(EVA); the plastic raw materials are Polyethylene (PE), Polypropylene (PP), Acrylonitrile Butadiene Styrene (ABS), and Polyoxymethylene (POM).
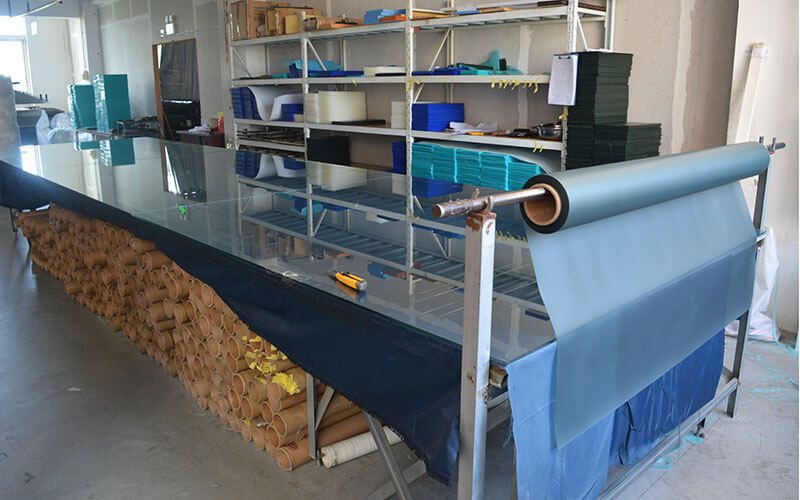
Film Cutting :
Cutting, or die-cutting in some cases, is the process used to shape the material into the desired shape for the hydration bladders. It is one of the most crucial steps in the manufacturing process. Here’s a general overview of the process:
Design and Material Selection: The production department chooses the right design and material selection, guided by the Bill of Materials (BOM) and purchase order (PO)provided by the sales department.
Cutting: The is to cut marked material following the pattern lines. It is cutting manually using scissors or knives or automatic cutting machines that can handle large volumes of material quickly and accurately.
Custom logos
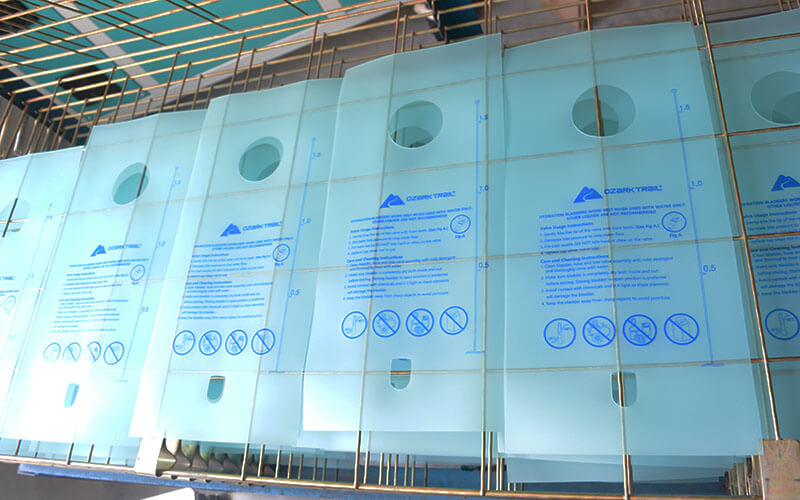
The next step is to custom logos after cutting. Two main methods are Silk Screen Printing and Electric Voltage (High-Frequency) Branding called imprint logos. The printing involves creating a stencil (also known as a “screen”) and applying layers of ink onto the film’s surface. The imprint logos use high-frequency electromagnetic waves to imprint logos onto the film. Make a die in the logo’s shape, and place the film between the die and an electrode.
Silk screening on the film or membrane of a hydration bladder required a surface heat treatment as a pretreatment step. This process can help prepare the bladder’s surface for printing, enhancing the adhesion of the ink and ensuring a more durable and high-quality print. This can make the image more durable and resistant to wear and tear, particularly important for a hydration bladder often used outdoors and in challenging conditions.
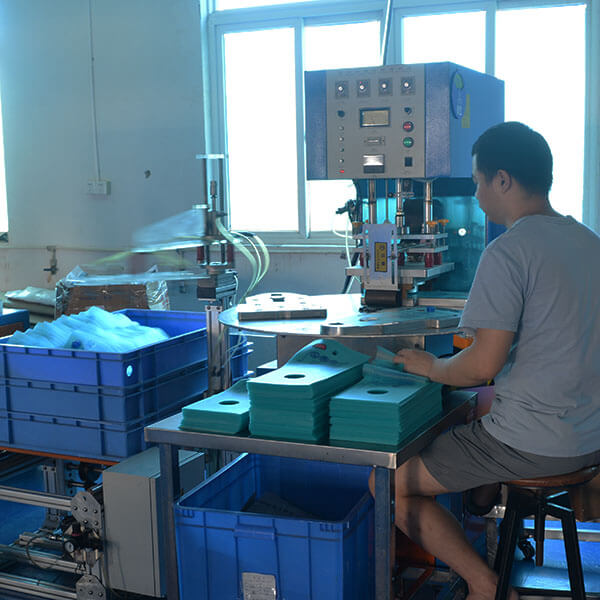
High-frequency welding process:
High-frequency welding, radio frequency (RF) welding, or dielectric welding, is a manufacturing process that uses high-frequency electromagnetic energy to fuse materials—producing hydration bladders, waterproof dry bags, etc.
The key to successful High-frequency welding, especially in manufacturing hydration bladders, is the consistency in the type of material used. For instance, if the body of the hydration bladder is TPU (thermoplastic polyurethane), other components that connect to the body, such as the cap and quick-connect parts, should also be made from TPU.
It is crucial because high-frequency welding relies on the dielectric properties of the used materials. Applying electromagnetic energy heats the fabric inside out, causing the molecules to move and mix. Once cooled, the material fuses, creating a strong, airtight seal.
However, using two different materials may have other dielectric properties, and the welding process may need to be more effective and consistent. This could result in weak points or leaks, compromising the hydration bladder’s functionality. Therefore, it’s crucial to maintain consistency in the material used throughout the product to ensure a reliable, strong, and leak-proof seal.
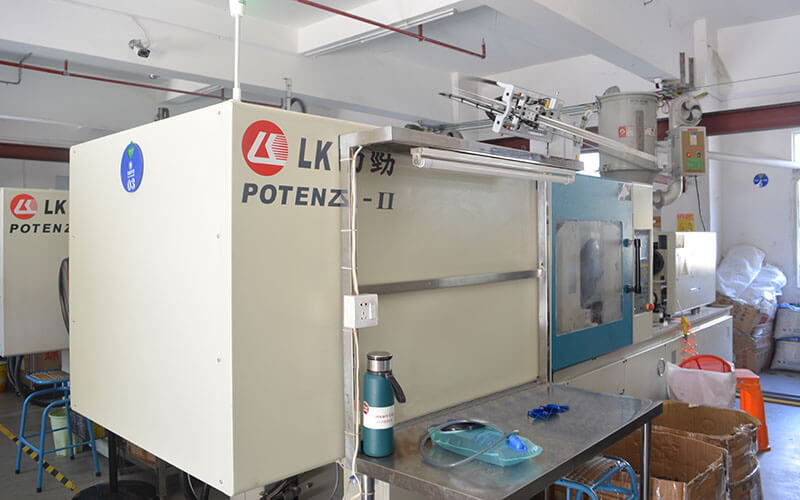
Injection molding Process
The plastic components produced through injection molding play an essential role in constructing hydration bladders.
Injection molding is a manufacturing process used for the mass production of parts from both thermoplastic and thermosetting plastic materials. The plastic is melted and injected into a mold under high pressure. Once inside the mold, the plastic cools and hardens to the shape of the mold. After sufficiently cooling, the molded part is ejected, and the process can begin again.
In the context of hydration bladders, injection molded parts could include the cap, the drinking tube, the bite valve, quick-connect components, and other plastic members.
These components must be designed and produced with precision. They play critical roles in the functionality of the hydration bladder, such as allowing the user to drink from the bladder, securely closing the bladder to prevent leaks, or providing quick and convenient access to the liquid inside.
These plastic components must also be made from safe, durable materials, as they will come into contact with the liquid inside the bladder and the user’s mouth. Most manufacturers will use food-grade, BPA-free plastics for these components.
Overall, injection-molded plastic components are crucial in the design and function of hydration bladders.
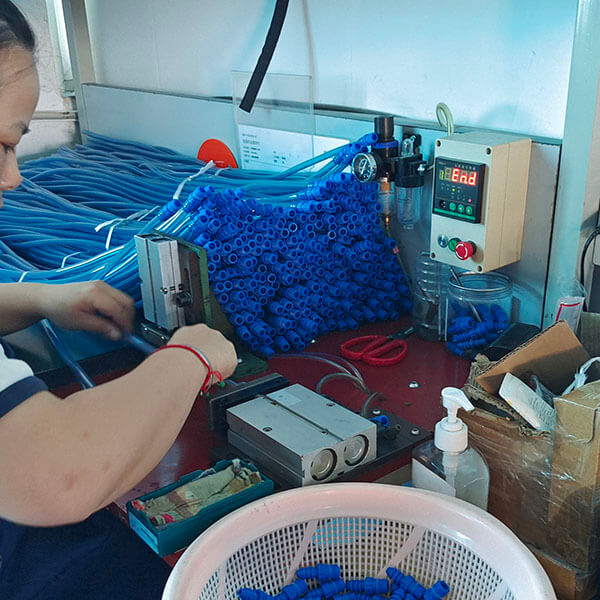
The assembly process
The assembly of components is a crucial part of the production process for hydration bladders. Elements such as the O-rings (sealing rings), the water tube outlet, the bite valve (mouthpiece), and the cap’s assembly ensure the final product’s functionality and integrity.
O-rings: These small but essential components help create airtight and leak-proof seals in different parts of the hydration bladder, such as where the water tube connects to the bladder. They must be correctly installed to prevent any leaks.
Water Tube Outlet: This is where the drinking tube is connected to the main body of the bladder. This connection point needs to be secure and designed so that the tube can be easily attached and detached for cleaning and filling.
Bite Valve (Mouthpiece): This is the part that the user drinks from. It’s usually designed to prevent water from flowing out unless bitten or sucked on, providing a convenient and leak-proof way to drink from the bladder.
Cap: The cap is used to seal the opening where the bladder is filled with water. It must provide a secure seal to prevent leaks, but it must also be easy to open and close for convenience.
The assembly process must be done with precision and care to ensure all components fit together correctly and securely. A hydration bladder with improperly assembled parts may lead to leaks or difficulties in use, compromising the overall user experience. Therefore, the assembly of components is a vital step in manufacturing hydration bladders.
Quality checking:
Quality control is a crucial part of the manufacturing process for hydration bladders. Each product must be 100% inspected and pass stringent quality checks before it is considered acceptable.
One standard quality testing method for hydration bladders involves inflating the bladder with air and submerging it in water. If any air bubbles emerge while the bladder is submerged, this indicates that there is a leak somewhere in the product. Only bladders that show no signs of air bubbles (leaks) during this test are deemed to have passed the quality control process.
This method is a practical and effective way of testing the integrity of the hydration bladder, as even a tiny leak would cause visible bubbles in the water. Such rigorous quality checks are vital to ensure the product’s functionality and safety. After all, a hydration bladder that leaks would not be helpful to the end user and could even cause damage to other items if the leak goes unnoticed.
Packing:
Packaging is the final step in the manufacturing process of a hydration bladder, and it’s just as important as any other part of the process. Proper packaging ensures that the product is protected from damage during shipping and handling and also provides a professional and attractive presentation to the end customer.
The packaging process may include the following steps:
Cleaning: Before packaging, each hydration bladder is typically cleaned to ensure it’s free from dust, debris, or manufacturing residues.
Inspection: After cleaning, the product undergoes a final inspection to ensure it has passed all quality checks.
Packing: The hydration bladder is then placed in its packaging, a box, bag, or other container designed to protect the product. The packaging often includes branding elements such as the company logo, product information, usage instructions, and any necessary warning labels.
Sealing: Once the hydration bladder is inside, the package is sealed to protect the product from contamination and damage.
Storage and Shipping: The packaged hydration bladders are then ready for shipping. They are typically arranged on pallets or in crates for bulk transport to retailers or distribution centers.
Manufacturers must use durable, high-quality packaging materials to ensure the product arrives to the end customer in perfect condition. The packaging design should also appeal to the customer and provide all necessary information about the product.
Conclusion
Producing a hydration bladder involves several essential steps, each contributing to the final product’s quality, functionality, and safety.
Material Selection: Materials such as TPU (thermoplastic polyurethane), PEVA (Polyethylene vinyl acetate), or PVC (polyvinyl chloride) are typically used for their durability, flexibility, and safety for use with consumable liquids.
High-Frequency Welding: This process is used to create the main body of the bladder, with consistency in the material type being crucial for practical welding.
Injection Molding: This process creates plastic components such as the cap, drinking tube, bite valve, and quick connect.
Assembly: Components like O-rings, the water tube outlet, the bite valve, and the cap are assembled correctly to ensure the functionality and integrity of the final product.
Quality Control: Each product must pass stringent quality checks, such as a leak test before it is acceptable.
Packaging: The final product is cleaned, inspected, packaged, sealed, and then stored for shipping. The packaging protects the product, provides information to the customer, and appealingly presents the product.
By meticulously following these steps, manufacturers can ensure they deliver a reliable, high-quality hydration bladder to their customers.